CentOS 7安装Zabbix3.0
Zabbix是开源的监控服务器性能的工具。
使用它可以搭建一个“监控性能服务器”,专门监控其它服务器的性能。
Zabbix使用MySQL/MariaDB/Oracle/IBM DB2存储数据,使用PHP做web接口。
官网上的介绍:
Zabbix is the ultimate enterprise-level software designed for real-time monitoring of millions of metrics collected from tens of thousands of servers, virtual machines and network devices.

Zabbix is Open Source and comes at no cost.
Zabbix最新发布了3.0.1版本。
下面记录了在CentOS 7上安装Zabbix的步骤,应该适用于其它基于RHEL的Linux发行版。
我的系统环境:
- CentOS 7
- hostname:zabbix.topspeedsnail.com
- IP:159.203.205.23
在安装之前,update系统:
# yum update
添加Zabbix仓库:
# yum install epel-release
# rpm -ivh http://repo.zabbix.com/zabbix/3.0/rhel/7/x86_64/zabbix-release-3.0-1.el7.noarch.rpm
安装Zabbix Server,MariaDB数据库, Web Server和PHP:
# yum install zabbix-server-mysql zabbix-web-mysql mysql mariadb-server httpd php
启动MariaDB数据库:
# systemctl start mariadb
# systemctl enable mariadb
运行MySQL安全设置脚本(mysql_secure_installation):
# mysql_secure_installation
设置MySQL root密码和其他安全参数。
现在创建一个名为zabbix_db的数据库和一个新用户my_zabbix:
# mysql -u root -p
MariaDB [(none)]> create database zabbix_db;

MariaDB [(none)]> grant all privileges on zabbix_db.* to my_zabbix@localhost identified by 'your_password';

MariaDB [(none)]> flush privileges;

MariaDB [(none)]> exit
替换上面的your_password为你要设置的密码。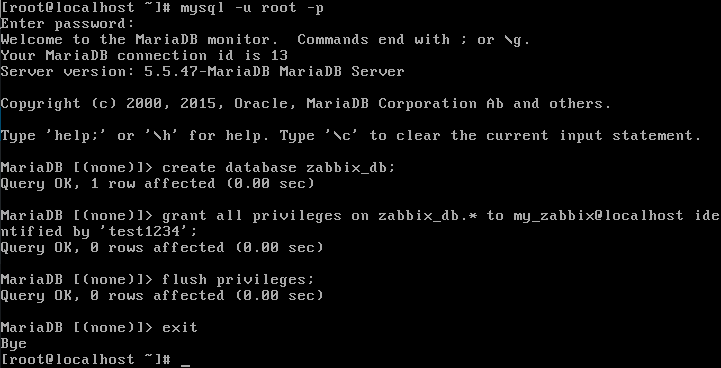
把数据导入到zabbix_db数据库:
# cd /usr/share/doc/zabbix-server-mysql-3.0.1

# gunzip create.sql.gz
# mysql -u root -p zabbix_db < create.sql
编辑Zabbix配置文件:
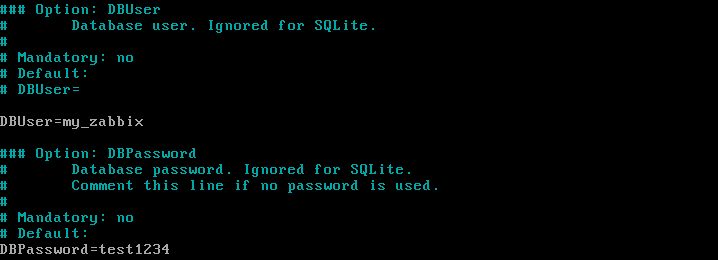
它的配置文件位于/etc/zabbix/zabbix_server.conf,配置数据库:
# vim /etc/zabbix/zabbix_server.conf
修改为如下参数:
DBHost=localhost
DBName=zabbix_db
DBUser=my_zabbix
DBPassword=test1234
把test1234替换为你的my_zabbix用户密码。

编辑PHP配置文件:
# vim /etc/php.ini
修改为如下参数:
max_execution_time = 600
max_input_time = 600
memory_limit = 256M
post_max_size = 32M
upload_max_filesize = 16M
date.timezone = Asia/Hong_Kong
配置防火墙:
# firewall-cmd --permanent --add-port=10050/tcp
# firewall-cmd --permanent --add-port=10051/tcp
# firewall-cmd --permanent --add-port=80/tcp

# firewall-cmd --reload
# systemctl restart firewalld
如果你的系统没有安装firewalld,安装:
# yum install firewalld
# systemctl start firewalld
当然,你也可以使用iptables。
设置Selinux规则:
# setsebool -P httpd_can_connect_zabbix=1
启动各种服务程序:
# systemctl start zabbix-server
# systemctl enable zabbix-server

# systemctl start httpd
# systemctl enable httpd
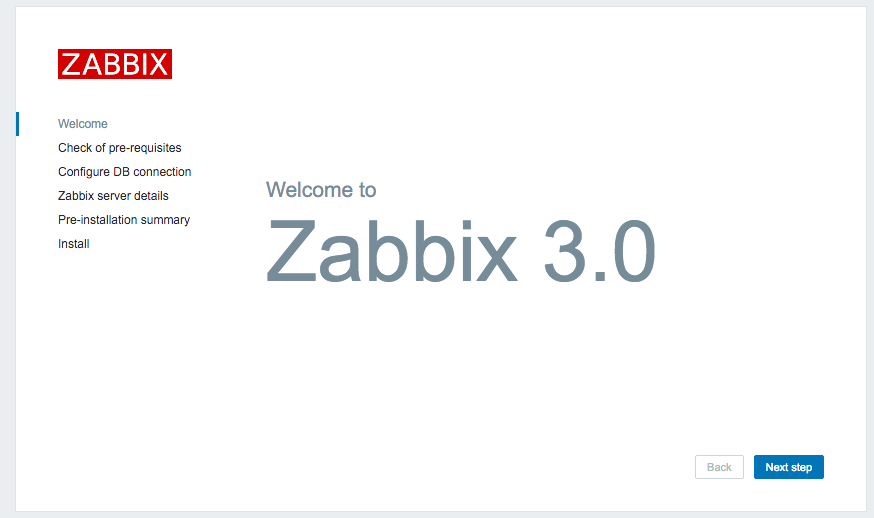
使用浏览器访问Zabbix Web接口:
http://your_doman_or_IP/zabbix/
开始安装向导:
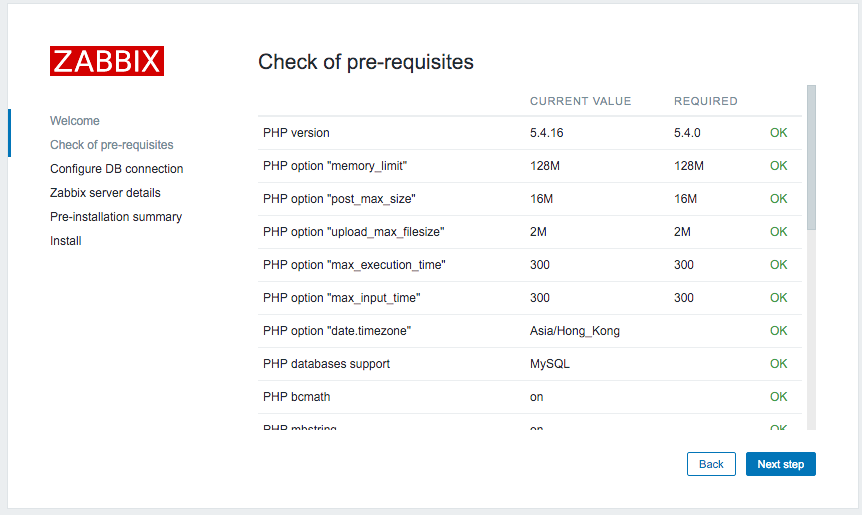
检查需要的组件是否安装:
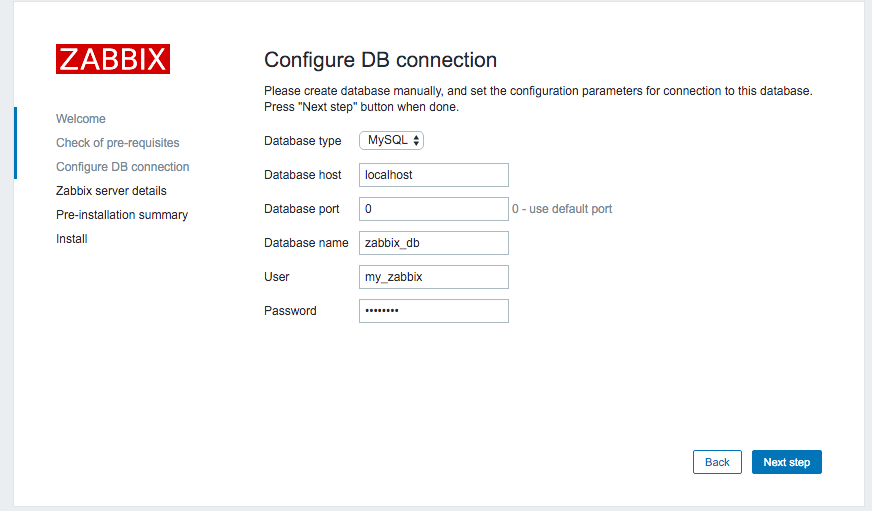
配置数据库连接:
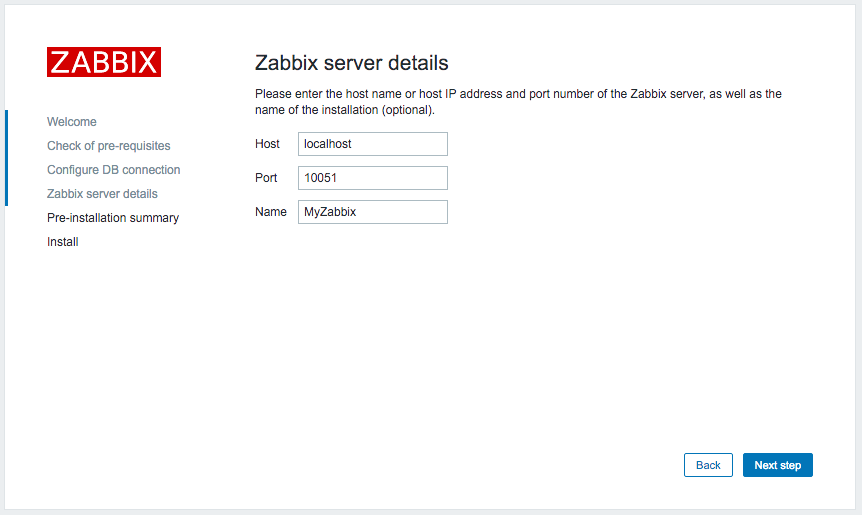
配置Zabbix:
Next:

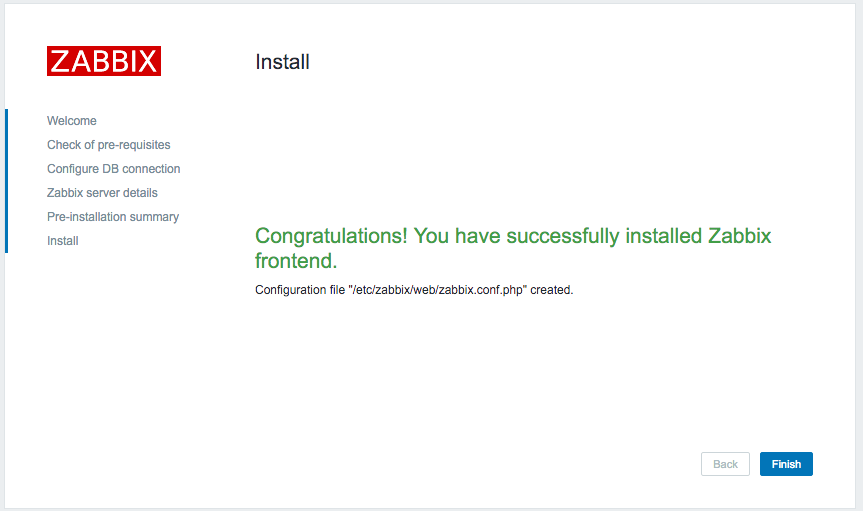
安装完成:
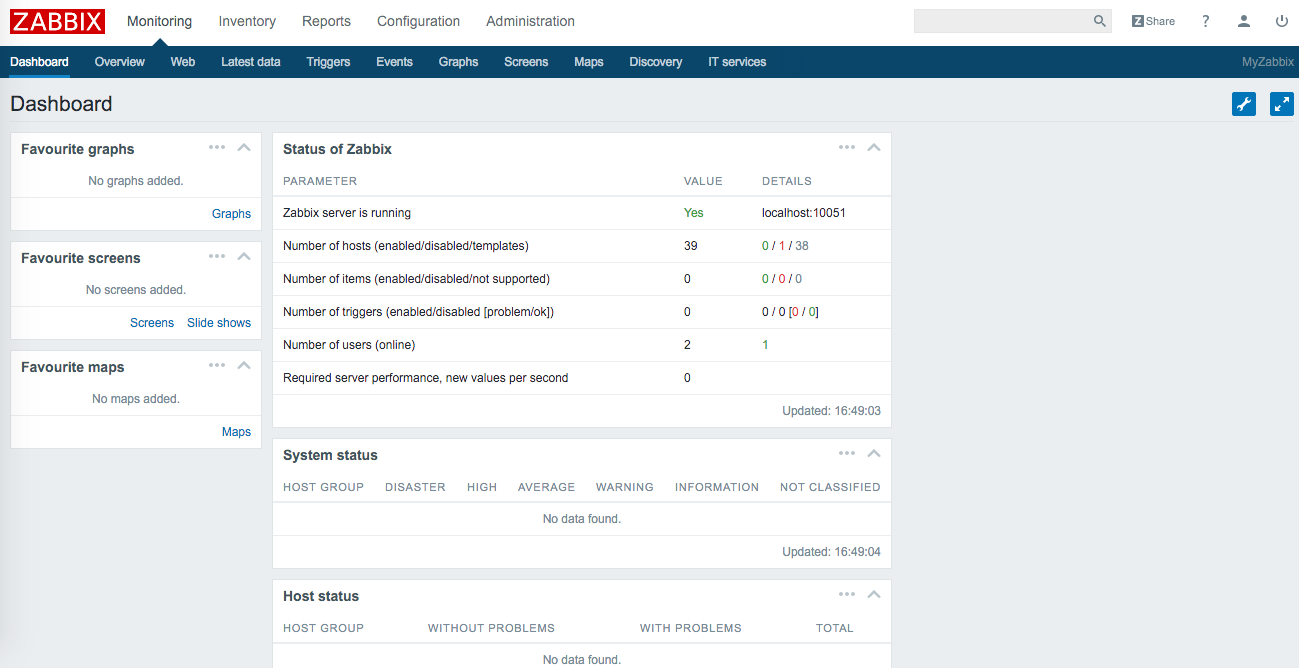
点击Finish它会自动转向到登录界面;登录,默认用户名”admin”,密码”zabbix”:

zabbix的主界面:
安装完成之后Zabbix服务器并没有监控任何服务器;我们来添加一个服务器节点,让Zabbix服务器进行监控。
假设我想监控安装有Ubuntu 16.04的服务器,我需要在Ubuntu上安装zabbix客户端:
$ sudo apt-get install zabbix-agent
编辑zabbix-agent的配置文件,添加Zabbix服务器IP:
$ sudo vim /etc/zabbix/zabbix_agentd.conf
更改为:
Server=159.203.205.23
ServerActive=159.203.205.23
Hostname=zabbix.topspeedsnail.com
替换你Zabbix服务器的IP。
启动zabbix-agent:
$ sudo systemctl start zabbix-agent
$ sudo systemctl enable zabbix-agent
在Zabbix web接口中添加新节点:
Configuration —> Hosts –> Create Host:
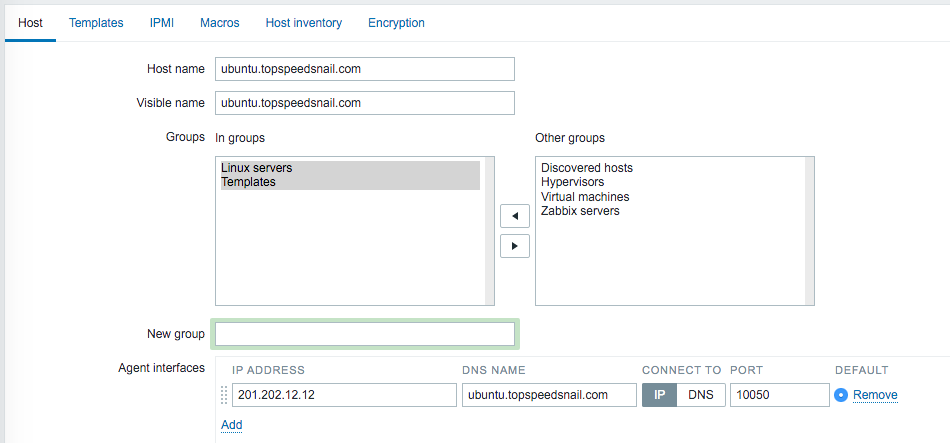
填写节点的信息。选择Templates:

Monitoring —> Triggers,查看监控的节点。
标签云
-
SaltStackIOSCactiTensorFlowMacOSMemcacheSVNLUASecureCRT部署KVMNFSOpenStackZabbixCurlShellVirtualboxLinuxSSHAndroid容器FirewalldSocketBashApacheIptablesAnsibleSwarmVsftpdKubernetesUbuntuGITOpenrestySQLAlchemyKloxo代理服务器CrontabPostgreSQLMariaDBWiresharkVirtualminDeepinRsyncMySQLDNS备份OfficeLighttpdWordPressCentosFlutterMongodbiPhoneYumGolangSwiftPostfixRedhatPHPRedisPuttyOpenVZDocker监控CDNJenkinsAppleHAproxyDebianTcpdumpSambaVPSWgetWindowsWPSNginxKotlinPythonGoogleFlasksquidInnoDBSnmp集群Systemd缓存TomcatVagrantSupervisorLVM