Ubuntu 16.04使用apt-fast加速apt-get下载安装包
使用 apt-fast shell 封装器,通过多个连接同时下载一个包来加速 apt-get/apt 和 aptitude 命令,进而使得自己的工作效率得到提升。
如何加速在 Ubuntu Linux 16.04 或者 14.04 LTS 上从多个仓库中下载包的 apt-get 或者 apt 命令?你需要使用到 apt-fast 这个 shell 封装器,它会通过多个连接同时下载一个包来加速 apt-get/apt 和 aptitude 命令并且所有的包都会同时下载,另外它使用 aria2c 作为默认的下载加速器。
安装 apt-fast 工具
在 Ubuntu Linux 14.04 或者之后的版本尝试下面的命令:
$ sudo add-apt-repository ppa:saiarcot895/myppa

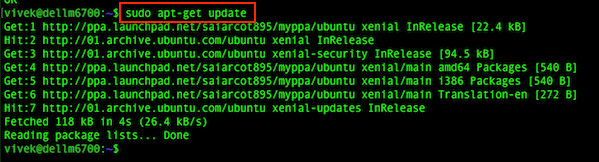
更新你的仓库:
$ sudo apt-get update
或者
$ sudo apt update
安装 apt-fast:
$ sudo apt-get -y install apt-fast
或者
$ sudo apt -y install apt-fast
Reading package lists... Done
Building dependency tree
Reading state information... Done
The following additional packages will be installed:
  aria2 libc-ares2 libssh2-1
Suggested packages:
  aptitude
The following NEW packages will be installed:
  apt-fast aria2 libc-ares2 libssh2-1
0 upgraded, 4 newly installed, 0 to remove and 0 not upgraded.
Need to get 1,282 kB of archives.
After this operation, 4,786 kB of additional disk space will be used.
Do you want to continue? [Y/n] y
Get:1 http://01.archive.ubuntu.com/ubuntu xenial/universe amd64 libssh2-1 amd64 1.5.0-2 [70.3 kB]
Get:2 http://ppa.launchpad.net/saiarcot895/myppa/ubuntu xenial/main amd64 apt-fast all 1.8.3~137+git7b72bb7-0ubuntu1~ppa3~xenial1 [34.4 kB]
Get:3 http://01.archive.ubuntu.com/ubuntu xenial/main amd64 libc-ares2 amd64 1.10.0-3 [33.9 kB]
Get:4 http://01.archive.ubuntu.com/ubuntu xenial/universe amd64 aria2 amd64 1.19.0-1build1 [1,143 kB]
54% [4 aria2 486 kB/1,143 kB 42%]                                    20.4 kB/s 32s
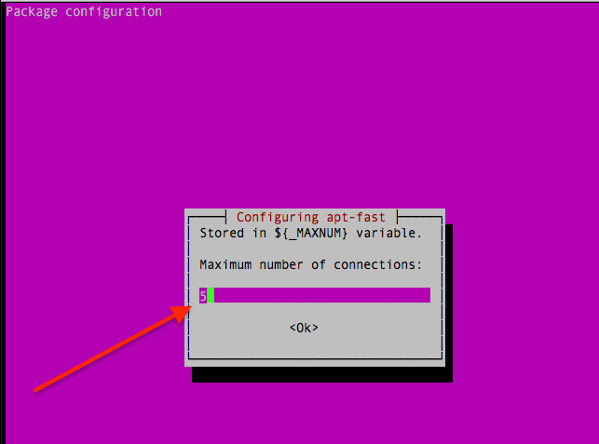
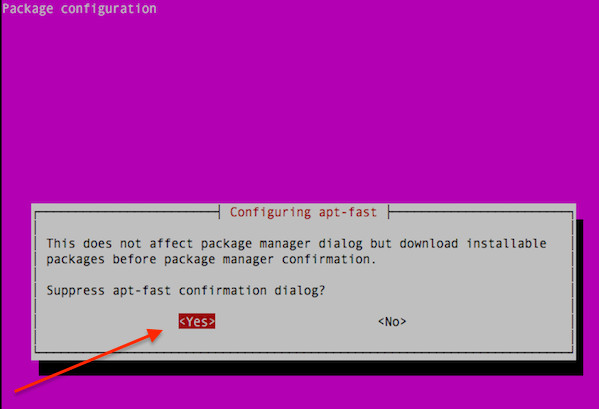
配置 apt-fast
你将会得到下面的提示(必须输入一个5到16的数值):
并且
你也可以直接编辑设置:
$ sudo vi /etc/apt-fast.conf
请注意这个工具并不是给慢速网络连接的,它是给快速网络连接的。如果你的网速慢,那么你将无法从这个工具中得到好处。
该怎么使用 apt-fast 命令?
语法是:
$ apt-fast command
$ apt-fast [options] command
使用 apt-fast 取回新的包列表:
$ sudo apt-fast update
使用 apt-fast 执行升级:
$ sudo apt-fast upgrade
执行发行版升级(发布或者强制内核升级),输入:
$ sudo apt-fast dist-upgrade
安装新的包
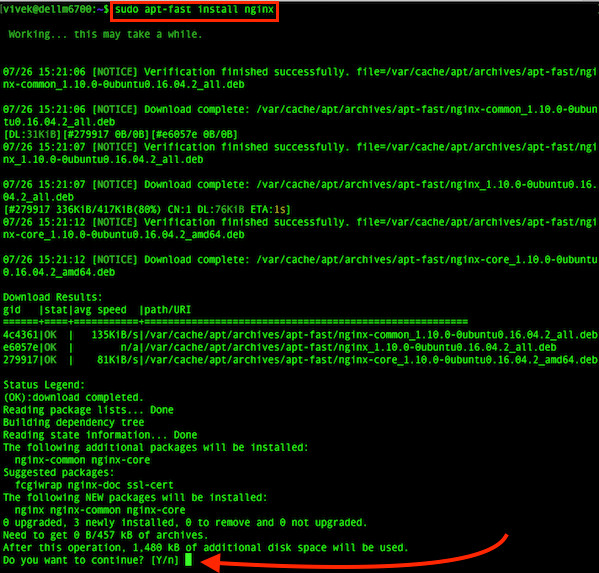
$ sudo apt-fast install pkg
比如要安装 nginx,输入:
$ sudo apt-fast install nginx
删除包:
$ sudo apt-fast remove pkg
$ sudo apt-fast remove nginx
删除包和它的配置文件:
$ sudo apt-fast purge pkg
$ sudo apt-fast purge nginx
删除所有未使用的包:
$ sudo apt-fast autoremove
下载源码包:
$ sudo apt-fast source pkgNameHere
清理下载的文件:
$ sudo apt-fast clean
清理旧的下载文件:
$ sudo apt-fast autoclean
验证没有破坏的依赖:
$ sudo apt-fast check
下载二进制包到当前目录:
$ sudo apt-fast download pkgNameHere
$ sudo apt-fast download nginx
[#7bee0c 0B/0B CN:1 DL:0B]
07/26 15:35:42 [NOTICE] Verification finished successfully. file=/home/vivek/nginx_1.10.0-0ubuntu0.16.04.2_all.deb
07/26 15:35:42 [NOTICE] Download complete: /home/vivek/nginx_1.10.0-0ubuntu0.16.04.2_all.deb
Download Results:
gid   |stat|avg speed  |path/URI
======+====+===========+=======================================================
7bee0c|OK  |        n/a|/home/vivek/nginx_1.10.0-0ubuntu0.16.04.2_all.deb
Status Legend:
(OK):download completed.
下载并显示指定包的 changelog:
$ sudo apt-fast changelog pkgNameHere
$ sudo apt-fast changelog nginx
标签云
-
MySQLKotlinPuttyWindows监控SambaInnoDBCactiiPhoneShellUbuntuMacOSCentosVirtualminSystemdLUATomcatPostgreSQLSocketDNSDeepinRedisWPSSVNAppleWget集群Python容器WiresharkGolang代理服务器KubernetesNginx缓存SupervisorSSHLighttpdOfficesquidFirewalldGoogleNFSAnsibleRsyncFlaskLVMPostfixMongodbSQLAlchemySwiftSecureCRTOpenStackAndroidBashSwarmMemcache备份JenkinsHAproxySaltStackKloxoPHPLinuxVPS部署ApacheOpenVZVagrantCDNIOSIptablesRedhatOpenrestyWordPressTensorFlowYumCurlDockerGITZabbixFlutterKVMCrontabMariaDBSnmpTcpdumpDebianVirtualboxVsftpd