Mariadb二进制安装和配置说明
这几天搞智能DNS,用到了mariadb,在yum install mariadb以后,bind编译安装设置mysql目录时会报出一系列的错误,所以解决办法有3种:1.想都不要想跟定是库lib的问题,只能建立链接库 2.编译安装mariadb 3.二进制安装mariadb,编译很好时,所以选择了二进制安装mariadb。mariadb官网下载:https://downloads.mariadb.org/mariadb/10.2.11/ 你会发现有很多包,这里说明一下这些包都是干什么用的:

相关软件包介绍
mariadb-10.2.11.tar.gz 源代码包,编译用的
Galera 25.3.22 搞mariadb集群用的,单机不需要
mariadb-10.2.11-winx64.msi
mariadb-10.2.11-winx64.zip
mariadb-10.2.11-win32.zip
mariadb-10.2.11-win32.msi //这几个就不用说了吧,Windows上面用的。
//下面这个包是包含glibc的二进制包
mariadb-10.2.11-linux-glibc_214-x86_64.tar.gz (requires GLIBC_2.14+)
//各linux发行版二进制通用包,比如centos6
mariadb-10.2.11-linux-x86_64.tar.gz
//支持systemd的二进制包 (本例就是用这个) 比如centos7 systemd
mariadb-10.2.11-linux-systemd-x86_64.tar.gz (for systems with systemd)
//下面这几个是32位linux的包
mariadb-10.2.11-linux-i686.tar.gz
mariadb-10.2.11-linux-systemd-i686.tar.gz (for systems with systemd)
mariadb-10.2.11-linux-glibc_214-i686.tar.gz (requires GLIBC_2.14+)
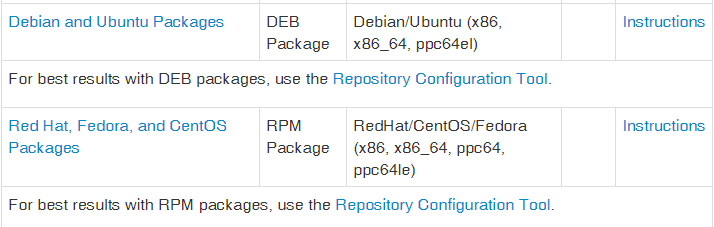
//下面这两个是rpm包
Debian and Ubuntu Packages
Red Hat, Fedora, and CentOS Packages
Mariadb安装步骤
#创建mysql用户和用户组,并禁止用户登陆
[root@toydns local]# groupadd mysql
[root@toydns local]# useradd -r -g mysql -s /sbin/nologin mysql

#下载mariadb包:
wget https://downloads.mariadb.org/interstitial/mariadb-10.2.11/bintar-linux-systemd-x86_64/mariadb-10.2.11-linux-systemd-x86_64.tar.gz

#解压:
tar xf mariadb-10.2.11-linux-systemd-x86_64.tar.gz

#更改安装目录:注意不要提前建立/usr/local/mysql目录,直接放过去即可
mv mariadb-10.2.11-linux-systemd-x86_64 /usr/local/mysql/

#进入/usr/local/mysql目录
[root@toydns mysql]#cd  /usr/local/mysql
[root@toydns mysql]# ll
total 204
drwxr-xr-x.  2 1021 1004  4096 Oct 26 14:04 bin
-rw-r--r--.  1 1021 1004 17987 Nov 27 18:09 COPYING
-rw-r--r--.  1 1021 1004 86263 Nov 27 18:09 COPYING.thirdparty
-rw-r--r--.  1 1021 1004  2275 Nov 27 18:09 CREDITS
drwxrwxr-x.  3 1021 1004  4096 Nov 28 06:16 data
drwxr-xr-x.  2 root root  4096 Dec  4 23:06 etc
-rw-r--r--.  1 1021 1004  8245 Nov 27 18:09 EXCEPTIONS-CLIENT
drwxrwxr-x.  3 1021 1004  4096 Nov 28 06:15 include
-rw-r--r--.  1 1021 1004  8694 Nov 27 18:09 INSTALL-BINARY
drwxr-xr-x.  4 1021 1004  4096 Nov 14 22:35 lib
drwxrwxr-x.  4 1021 1004  4096 Nov 28 06:16 man
drwxrwxr-x. 11 1021 1004  4096 Nov 28 06:15 mysql-test
-rw-r--r--.  1 1021 1004  2374 Nov 27 18:09 README.md
-rw-r--r--.  1 1021 1004 19510 Nov 27 18:09 README-wsrep
drwxrwxr-x.  2 1021 1004  4096 Nov 28 06:15 scripts
drwxrwxr-x. 32 1021 1004  4096 Nov 28 06:15 share
drwxrwxr-x.  4 1021 1004  4096 Nov 28 06:15 sql-bench
drwxrwxr-x.  4 1021 1004  4096 Nov 28 06:15 support-files


相关目录介绍:
bin: 可执行的二进制程序的存放目录,客户端程序mysql就位于这个目录下。
COPYING:版权以及开源信息
COPYING.thirdparty: 版权信息
CREDITS:关于MariaDB软件基金会的一些相关信息,里面还有国内的互联网巨头阿里
data:默认的数据库存放目录,如果我们一开始没有指定数据库存放目录的话,那就会被存储到这个位置。
EXCEPTIONS-CLIENT:例外情况
include:MariaDB 所需要的一些程序文件
INSTALL-BINARY: 安装帮助文档,可以详细阅读,对安装数据库有很大的帮助
lib: 软件运行所需要的库文件
man:软件的帮助文档
mysql-test: 数据库的测试组件
scipts:mysql初始化初始化时要用到的脚本文件,通读一下脚本,可以了解Mysql 的安装过程
share: 共享的文件内容
support-files: mysql 正常运行所需要的配置文件或者文档,这一点很重要,如果我们要自定义配置文件的话,就需要参考这里面的配置文件来进行定义。

这里有一点需要注意:data目录是数据库的存放路径,我们在之前已经手动指定。在实际生产中,企业数据增长很快,数据库文件有可能会很大,因此最好将该目录指定到一个单独的磁盘上,或者大分区,或者使用逻辑卷都可以,避免因物理空间不足,导致出现故障。

#创建mysql配置文件目录
mkdir  /usr/local/mysql/etc

#在/usr/local/mysql/support-files/下的配置文件模板,已经配置好的部分参数,分别用于不同的环境,这里说明一下:
my-small.cnf 这个是为小型数据库或者个人测试使用的,不能用于生产环境
my-medium.cnf 这个适用于中等规模的数据库,比如个人项目或者小型企业项目中,
my-large.cnf 一般用于专门提供SQL服务的服务器中,即专门运行数据库服务的主机,配置要求要更高一些,适用于生产环境
my-huge.cnf 用于企业级服务器中的数据库服务,一般更多用于生产环境使用
所以根据以上几个文件,如果个人使用或者测试,那么可以使用前两个模板;企业服务器或者64G以上的高配置服务器可以使用后面两个模板,另外也可以根据自己的需求来加大参数和扩充配置获得更好的性能。

[root@toydns mysql]# ll support-files/
-rw-r--r--. 1 1021 1004  4914 Nov 27 18:32 my-huge.cnf
-rw-r--r--. 1 1021 1004 20421 Nov 27 18:32 my-innodb-heavy-4G.cnf
-rw-r--r--. 1 1021 1004  4901 Nov 27 18:32 my-large.cnf
-rw-r--r--. 1 1021 1004  4914 Nov 27 18:32 my-medium.cnf
-rw-r--r--. 1 1021 1004  2840 Nov 27 18:32 my-small.cnf

#复制my-medium.cnf到etc下并改名为my.cnf,修改数据库文件存放的目录
cp support-files/my-medium.cnf  etc/my.cnf
vi etc/my.cnf

# The MariaDB server
[mysqld]
port            = 3306
socket          = /tmp/mysql.sock
basedir = /usr/local/mysql   //mysql目录
datadir= /usr/local/mysql/data  //数据存放位置
innodb_file_per_table = on  //每张表一个单独文件,便于管理
skip_name_resolve = on  //忽略反向解析,加快访问速度
skip-external-locking
key_buffer_size = 16M
max_allowed_packet = 1M
table_open_cache = 64
sort_buffer_size = 512K
net_buffer_length = 8K
read_buffer_size = 256K
read_rnd_buffer_size = 512K
myisam_sort_buffer_size = 8M

:wq保存后给权限
[root@toydns local]# chown -R mysql.mysql /usr/local/mysql/
[root@toydns local]# chmod -R 755 /usr/local/mysql/

#添加MySQL到PATH环境变量里面去,省的以后敲命令麻烦
[root@toydns mysql]# vi /etc/profile.d/mysql.sh
export  PATH=/usr/local/mysql/bin:$PATH

source /etc/profile.d/mysql.sh  使这个配置文件及时生效

#初始化mysql
/usr/local/mysql/scripts/mysql_install_db --user=mysql

#创建mariadb自启动脚本,并加入开机启动
cp /usr/local/mysql/support-files/systemd/mariadb.service  /usr/lib/systemd/system/

systemctl enable mariadb
systemctl start mariadb
systemctl stop mariadb
MySQL的安全设置
[root@toydns mysql]# ./bin/mysql_secure_installation

NOTE: RUNNING ALL PARTS OF THIS SCRIPT IS RECOMMENDED FOR ALL MariaDB
      SERVERS IN PRODUCTION USE!  PLEASE READ EACH STEP CAREFULLY!

In order to log into MariaDB to secure it, we'll need the current
password for the root user.  If you've just installed MariaDB, and
you haven't set the root password yet, the password will be blank,
so you should just press enter here.

Enter current password for root (enter for none):   //直接回车,默认为空
OK, successfully used password, moving on...

Setting the root password ensures that nobody can log into the MariaDB
root user without the proper authorisation.

Set root password? [Y/n] y     //是否设置MySQL管理员root的密码,y设置,输入2次
New password:
Re-enter new password:
Password updated successfully!
Reloading privilege tables..
 ... Success!


By default, a MariaDB installation has an anonymous user, allowing anyone
to log into MariaDB without having to have a user account created for
them.  This is intended only for testing, and to make the installation
go a bit smoother.  You should remove them before moving into a
production environment.

Remove anonymous users? [Y/n] y    //是否删除匿名账户 y删除
 ... Success!

Normally, root should only be allowed to connect from 'localhost'.  This
ensures that someone cannot guess at the root password from the network.

Disallow root login remotely? [Y/n] n   //是否不允许root用户远程登陆,n不禁用
 ... skipping.

By default, MariaDB comes with a database named 'test' that anyone can
access.  This is also intended only for testing, and should be removed
before moving into a production environment.

Remove test database and access to it? [Y/n] y   //是否删除test测试数据库,y删除
 - Dropping test database...
 ... Success!
 - Removing privileges on test database...
 ... Success!

Reloading the privilege tables will ensure that all changes made so far
will take effect immediately.

Reload privilege tables now? [Y/n] y   //重新加载可用的数据库表  y 是
 ... Success!

Cleaning up...

All done!  If you've completed all of the above steps, your MariaDB
installation should now be secure.

Thanks for using MariaDB!
标签云
-
GoogleBashOpenStackPuttyUbuntuSQLAlchemyOpenrestyHAproxyWgetIOSVagrantFlutterLUA缓存MemcacheLVM集群Iptables备份MySQLSwarmPostgreSQLCactiDeepinMariaDBCDNGolangNFS部署InnoDBMacOSFirewalldRedhat容器SambaMongodbDebianiPhoneLighttpdOpenVZShellYumWindowsPostfixAndroidDNSSVNWordPressVirtualboxVsftpdSwiftOfficeAnsibleTomcatApacheTensorFlowSnmpKloxoNginxRedisRsyncsquidWireshark监控PythonZabbixSocketDockerSaltStackJenkinsWPSTcpdumpVPSCrontabCentosFlaskSystemdKubernetesGITPHP代理服务器SecureCRTVirtualminSSHKVMKotlinCurlLinuxSupervisorApple